Wednesday, March 18, 2015

Philly Cheese Steak Stuffed Peppers - (RECIPE)

Let me just start be saying, these peppers are AMAZE!! I mean, really!

This is only the second time I've made them and I think they will be a staple on my go-to list from now on!

What you need...
2 Green Peppers
8 oz Flank Steak, Thinly Sliced (if you're a Pittsburgh native, I found this pre-packaged at Market District in the beef section!)
8 Slices of Provolone Cheese
1/2 a Red Bell Pepper, Diced
1 Medium Onion, Diced
4 oz. Mushrooms, Sliced (optional! yuck!)
2 Tbsp. Extra Virgin Olive Oil
1 Tbsp. Minced Garlic
1 tsp. Worcestershire Sauce
Salt & Pepper to taste


  • Preheat oven to 400°, lightly spray 8x8 baking dish with non-stick spray
  • Start a pot of boiling water
  • Slice green peppers length wise, remove seeds and ribs
  • Place halves in boiling water for 3-5 minutes, until the peppers soften slightly and they lose a little of their bright color. Carefully remove and place open side down on paper towels to drain.
  • Heat EVOO in skillet, add garlic, onions, mushrooms, red pepper, salt and pepper, sautee until soft. 
  • Add in flank steak & worcestershire sauce, cook until meat is cooked through.
  • Place green peppers open side up in the baking dish, place one slice of cheese inside each pepper. Fill with meat mixture, top with second slice of cheese
  • Pop in the oven for about 10 minutes, or until cheese is a little golden
I serve these with some brown rice! Enjoy!!

Remember to come back and drop a comment below after you've tried these!!


Thursday, February 12, 2015

Sweet Potato Turkey Bacon Burgers! (RECIPE)

A few weeks ago I posted on my Facebook page about the awesome sweet potato, turkey bacon burgers I made and a lot of you were interested so heres a full post with recipe!!

These burgers were so awesome I ate them with a alive of provolone cheese and fresh romaine with no extra sauce needed!! I served them with a side of sweet potato fries. I was worried it would be TOO MUCH sweet potato, but it was perfect!!

Ingredients:
1 Lb. Lean Ground Beef or Turkey
6 Slices of Turkey Bacon
1 Cup Cubed/Mashed Sweet Potato

Line a microwave safe plate with paper towels, lay bacon on paper towels and cover with another paper towel. This will absorb any grease from the bacon, even though theres not much with turkey bacon! Clean your sweet potatoes, wet them and put them in plastic bags. My sweet potatoes were HUGE so I had to use two bags...

Since my sweet potatoes were so big, it took them about 9 minutes to fully cook in the microwave. The bacon only takes about 3-3.5 minutes so cook them accordingly. I cook the sweet potatoes first and then while I'm cubing/mashing, I get the bacon going.

When you have everything cooked, cubed, mashed and crumbled, mix it all together! Last time I made these I had an even amount of cubes and mashed potatoes, this time I completely mashed them. I don't recommend this. Once I started cooking them, they were falling apart pretty good!!

Since its February, I used a frying pan to cook my burgers but they could be grilled or put on a George Foreman, however you would normally cook a burger! :)

Finished product!!


Trying these soon? Make sure you come back after you've tried them and leave a review in the comments!!

Thursday, February 5, 2015

Turkey Taco Thursday (RECIPE)

Tacos are a go to meal in my house, usually always on Thursdays. You know those taco seasoning packets you buy at the grocery store? Well, they’re garbage. Terrible for you, salty, preservative loaded GARBAGE!! So today I’m going to share with you not only a healthy taco recipe, but also a homemade taco seasoning! You’re welcome!!

What you’ll need for the seasoning:
  • 1/2 Cup Chili Powder
  • 1 1/2 Tbsp. Garlic Powder
  • 2 Tbsp. Ground Cumin
  • 1/2 tsp. Cayenne Powder
  • 1 1/2 Tbsp Kosher Salt
  • 2 tsp. Dried Oregano


Mix them all together and store in an air-tight container!!
(Side note: I buy my containers at Penzy’s spices, they even come with labels!)

Now for the tacos!!
  • 1 Tbsp. Extra Virgin Olive Oil
  • 1 Medium Onion, Diced
  • 1 Lb. Lean Ground Turkey
  • 1/4-1/2 Cup Homemade Taco Seasoning (above)
  • 6 Oz. Tomato Paste
  • 3 Oz. Water
  • Corn tortilla shells


Optional toppings: shredded cheese, avocado, diced tomatoes and/or plain greek yogurt (instead of sour cream)

Heat oil in a large skillet over medium heat. Add onion and sauté until soft.

Add ground turkey and break up with a wooden spoon or spatula. Cook until no longer pink.

Stir in the taco seasoning and let cook for about 1 minute.

Stir in the tomato paste and water. Cook for another minute or two, until heated through.

Build tacos in warm corn tortillas!!


Don’t forget to drop a review down in the comments after you've tried it!!

Wednesday, February 4, 2015

Clean Eating Chicken Noodle Soup (RECIPE)!

Its time to get my blog back up and running!! I've been saying for months now that I'm going to start posting again but never do!! So here I am!! And what better way to get back at it than a HEALTHY Chicken Noodle Soup recipe?!

It's cold (at least here in PA), cold & flu season seems to be hitting hard and who doesn't LOVE chicken soup?!

So here it is! Fast, Simple, Easy and Yummy!! 

((TIME SAVING TRICK -- cut up your chicken and veggies the night before so you can throw everything together in the morning if you're pressed for time!))

  • 2 lbs chicken (raw) cut into 2 inch pieces
  • 6 cups low sodium chicken broth
  • 1/2 teaspoon crushed red pepper flakes, more or less to taste (or none at all if you're like me!)
  • 1 cup chopped celery
  • 4 chopped carrots
  • 1 small onion, sliced
  • 2 cloves garlic, minced
  • 1/4 cup fresh chopped parsley
  • 1/2 teaspoon black pepper
  • Sea Salt to taste
  • 8 ounces whole wheat pasta


Directions:
  • Add all of the ingredients, except the noodles, in the slow cooker and cook on low for 6-8 hours. The last hour of cooking, add the pasta and continue cooking for about one more hour.  
That's it!!  Enjoy!

Drop a review down in the comments after you've tried it!!


Friday, February 14, 2014

Valentine's Day Nursery Reveal

Happy Valentines Day!!!

I've never been one to really get into Valentine's day. Gifts that the prices have been jacked up on, just for the day. Flowers that die, candy is good while it lasts, dinner reservations at the most expensive place in town and $5 cards that get stuffed away somewhere never to be seen again. For what? To prove to someone ONE day out of 365 that we love them. Isn't this something we should be doing every day? Don't get me wrong, waking up this morning to a dozen roses, chocolate covered pretzels and a card put a nice smile on my face, but I would much prefer it on another random, meaningless day of the year, just because.

Anyway, now that I have that out of my system, I'll let you all in on what we've been working on the past few weeks!

I've been a major slacker in keeping up with my blog, but at the end of the day, I just haven't had the energy to put my thoughts into words. We've been working hard on the nursery to get it ready for my shower this weekend. It turned out BETTER than I could have ever imagined!! We still have a few finishing touches to make, like hanging her name on the wall, but since we are keeping her name a secret until she's born, I had to hold off on this detail :)

I will of course document the journey with photos…..WARNING: there may be a lot!

We have three bedrooms in our house, one thats obviously ours, one which was a guest room and an office. Well, the room that was the office is the bedroom on the corner of the house, which I did not want for the nursery. Its over the garage, theres two windows, noise from both sides, etc., so I chose the room in the middle of the house for her room. Thus meaning we had to move office furniture to the basement, bedroom furniture to the office and the baby furniture from the basement, to the nursery room. That was a chore and a project all in itself. Luckily we have good friends who offered to help and it didn't take long at all :)

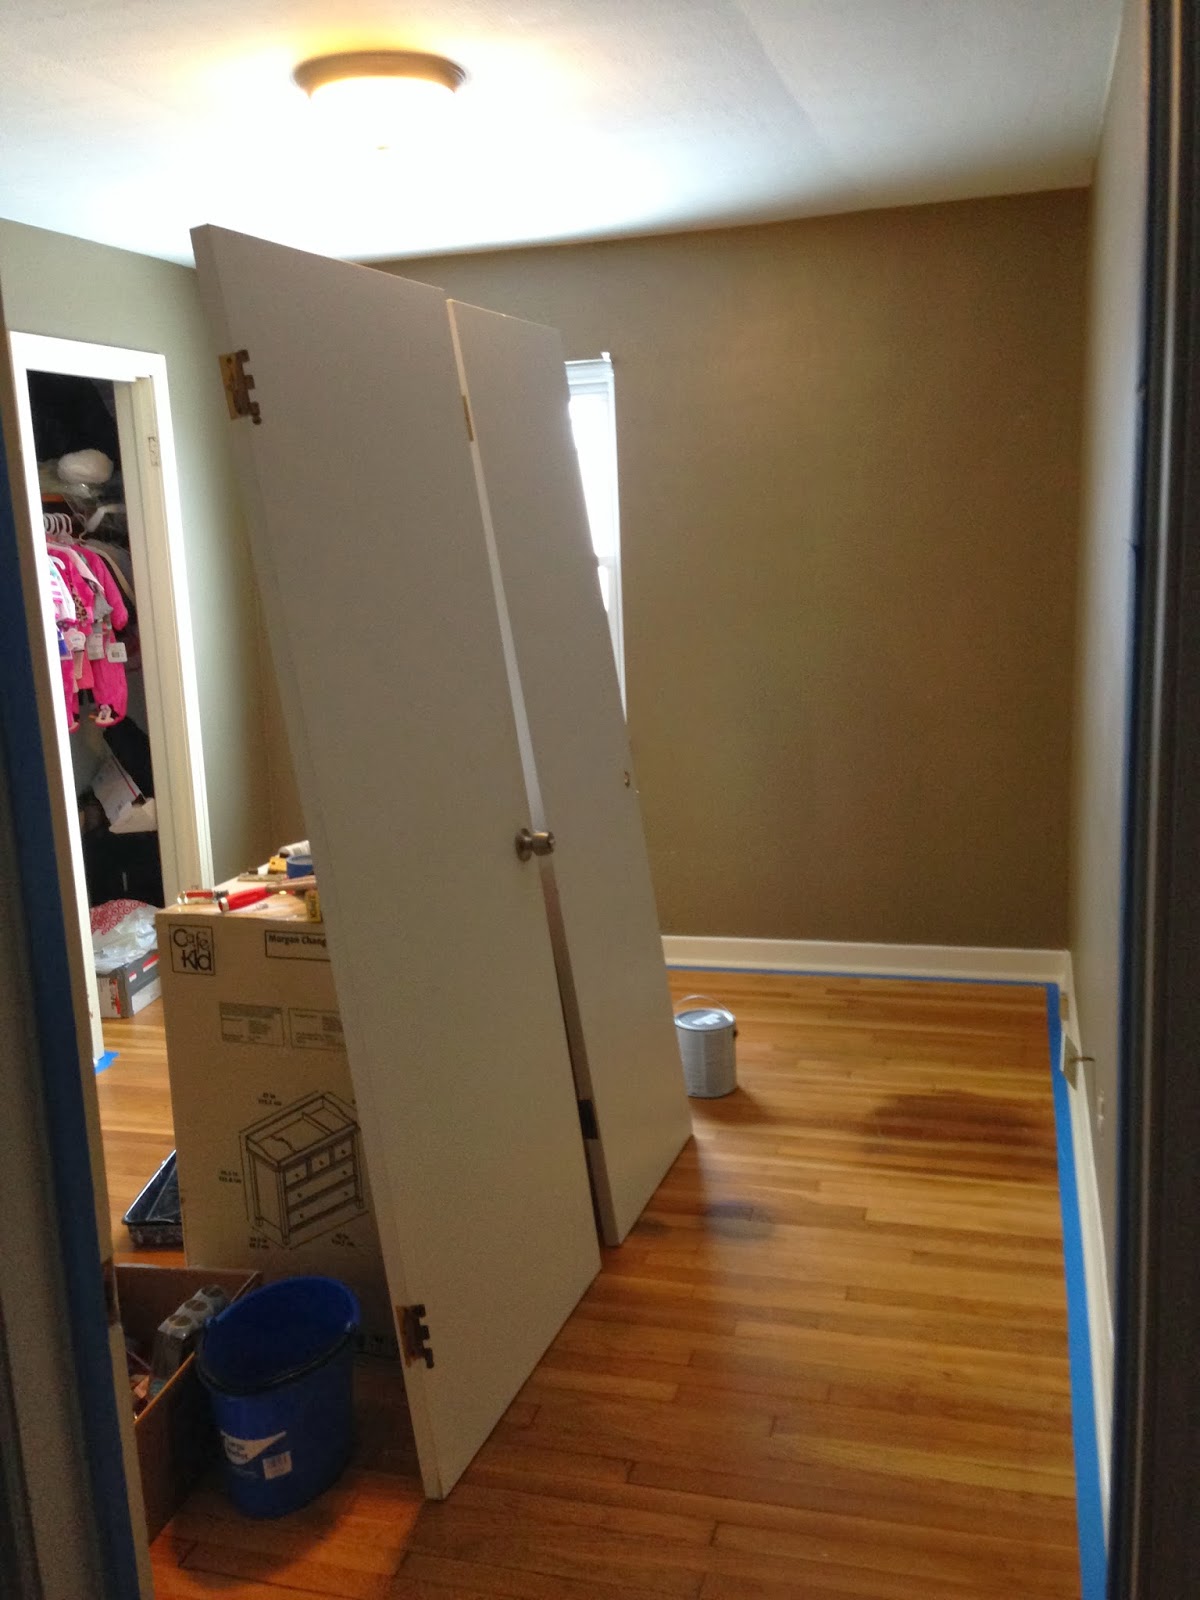
Here are some before pictures of the room…The color on the walls was a greenish grey color. Not terrible but also not great. Steve's old roommate picked it out...


And then there is primer!!


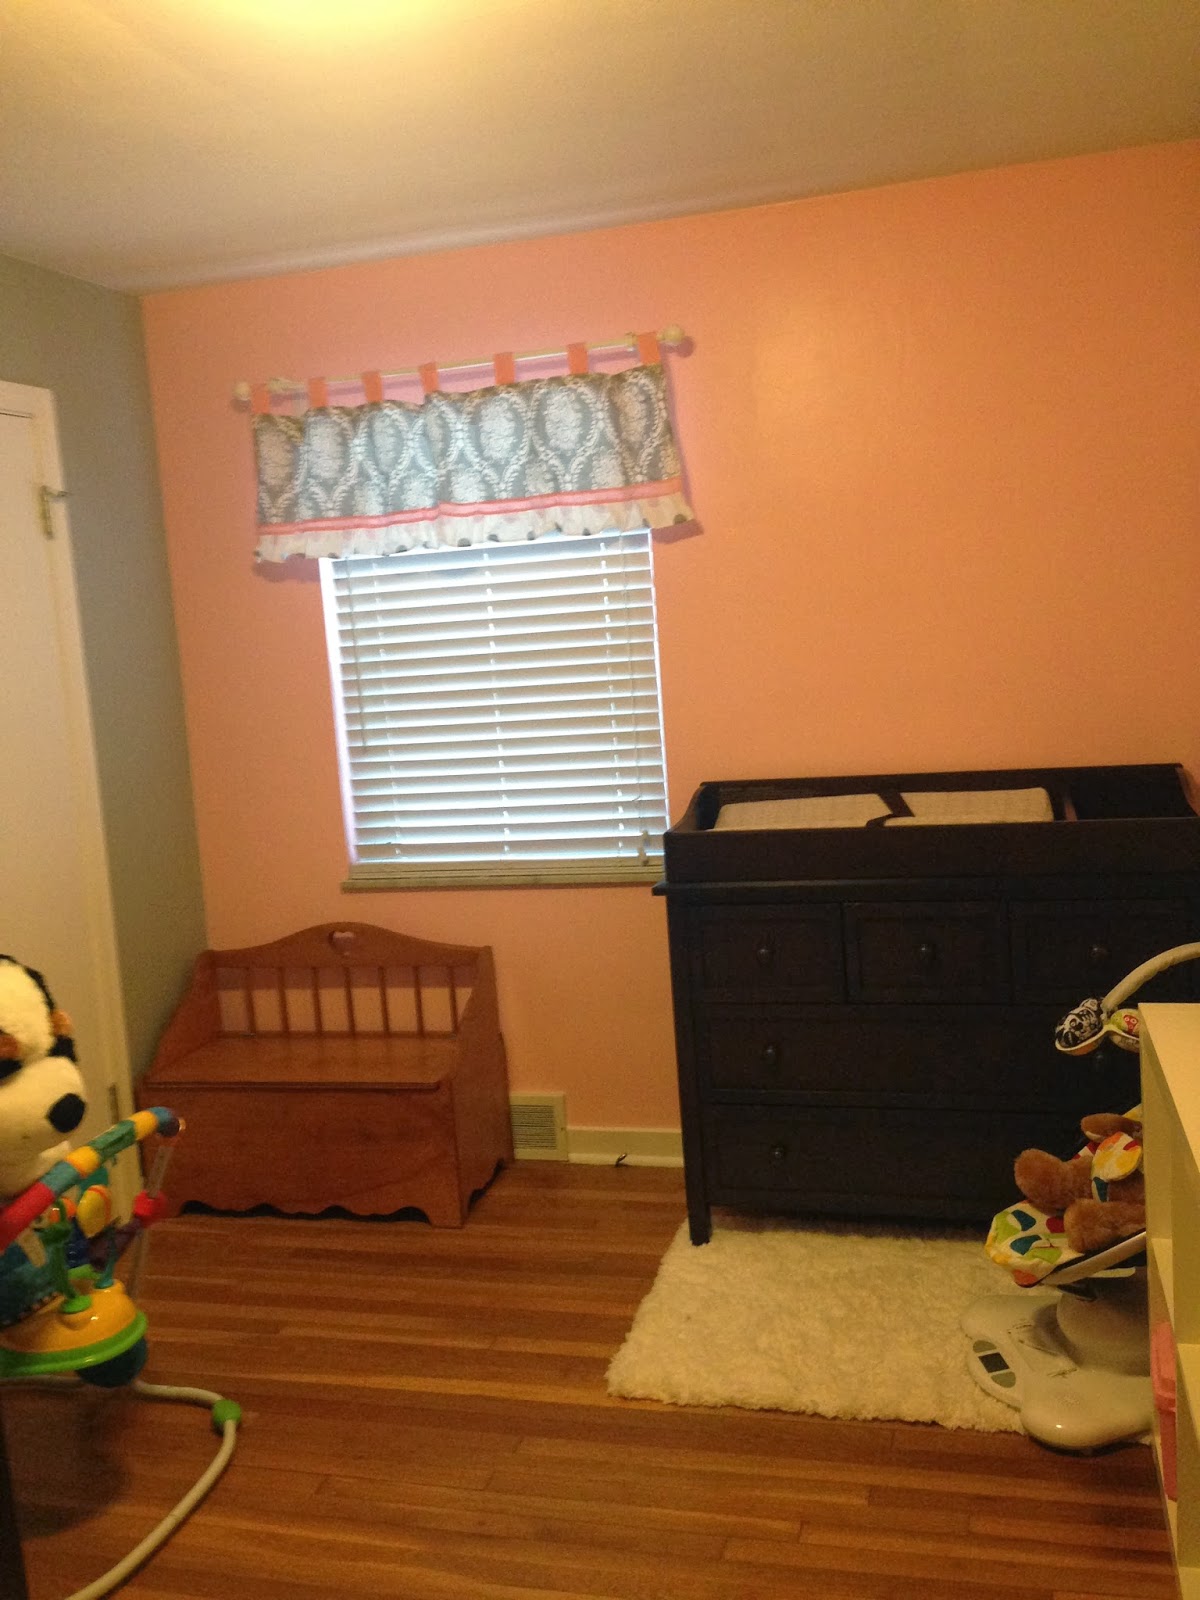
We chose pink, grey and white for the nursery colors. I was THRILLED as soon as I saw the pink start to go up on the wall!!!!


For the one wall with no breaks (window, closet, door), we did a striped accent wall. I wasn't sure how it would turn out with everything else I had planned in my head for the room, but I absolutely love it and think it pulls the whole room together!! THIS was a definite test in our relationship as Steve yelled at me the whole time for not doing what he was telling me to do when we were trying to tape the walls. In the end, he taped them himself, it was better that way!


The finished stripe wall!

(don't you just love it?!)

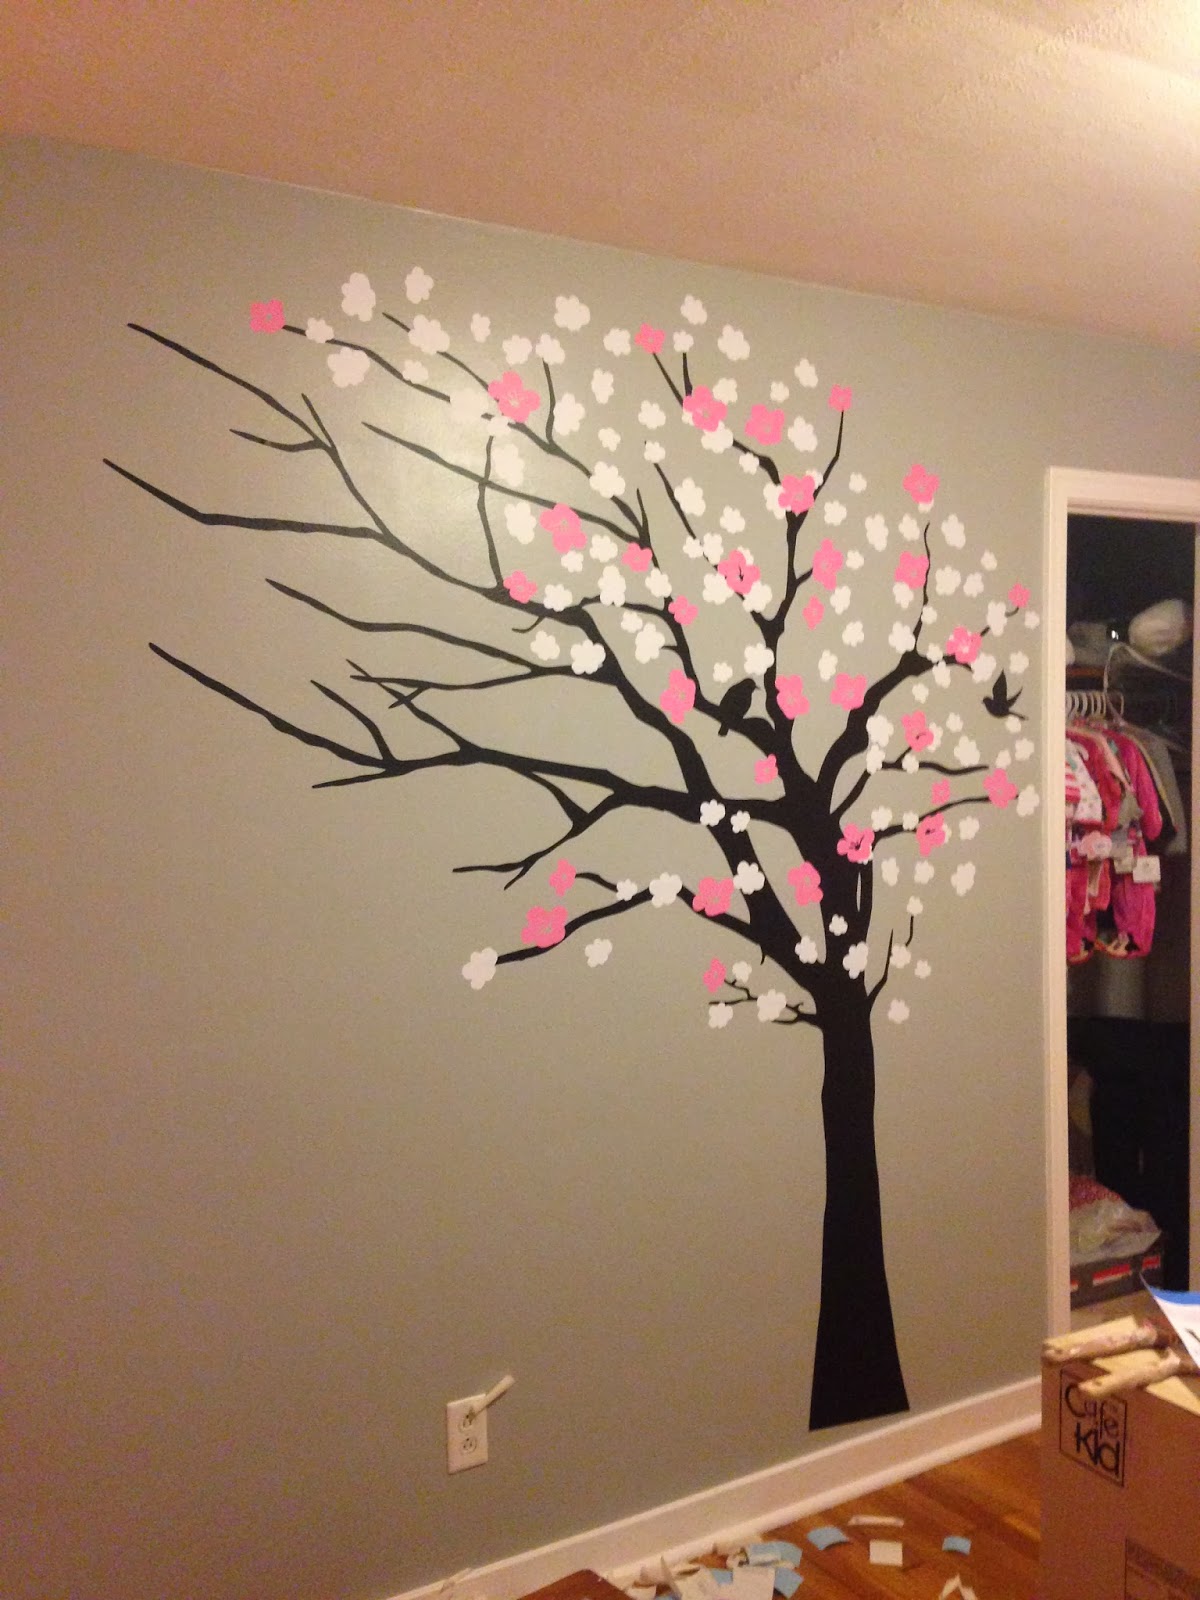
Then came the tree project…this was actually the inspiration for the entire room. Back when we first found out we were expecting, I saw a pin on pinterest with this wall decal…it was in a pink/grey room above the crib and I just LOVED it. I searched high and low for the decal and finally found it!! The picture was actually from the etsy listing for the decal! I ordered it right away and knew I had to have this room!! Little did I know, when I pulled the decal out of the box, it came in a million different pieces. Its huge, so I didn't think it would be all one, but I also didn't expect it to be so many…you'll see through the progress photos that it was quite a task! I didn't take photos while applying the tree trunk and branches, but those were also all separate. Everything came printed on big sheets that had to be cut apart, I numbered them according to the directions (smart thinking there), and had Steve apply the trunk and branches. 

When it came to the leaves and flowers, I kicked Steve off the project, hung the original picture on the wall and copied it leaf for leaf…


After the decal we built furniture, painted the doors, my mom bought bedding for the crib and had it sent to us, we bought rugs, a light, and we started adding things here and there…I also painted some pictures to hang up. You may recognize the bird paintings from my 12 Days of Christmas post. In that post though I only gave a photo of the inspirational piece. This will show the finished project. Also, as I said about the tree decal, it was the inspiration for the whole room. When I saw the bird paintings when I was trying to think of something for my day three of 12 days of Christmas, I knew it would be perfect!!


(Don't know if its hard to read…the top one says "Baby makes…days shorter, nights longer, home happier & love stronger")


So thats the finished project for now! I have two showers coming up, one here in Pittsburgh this weekend and another in Erie in two weeks so I'm SURE there will be more to add and organize which makes me excited!! Since we finished everything I find myself standing in there looking for something to do. It quickly became my favorite room in the house!!

Hope everyone has a wonderful Valentine's day! I know I will, I'm off to a doctor's appointment soon and then I'm finally using my Christmas gift card to pamper myself for the day with a haircut, mani and pedi! Now if only there were a mzssage included too!


Monday, January 20, 2014

Playing Catch Up...

I've been a slacker lately on posting! I said I would update at least once a week but I think I skipped a week, whoops!

Anyway, few things to report…

We are going to take the house off the market. With the baby coming in less than 3 months theres no way we will be able to move and be settled by the time she gets here. Plus, with my job in the air as far as if we will be staying downtown, moving to a new location or being sent home to work, its hard to pick out an area to live in…

Basically theres just too many unknowns so we decided the safest thing to do is stay in this house for a while. I really wanted to be out of the Penn Hills school district before she was born but, oh well, everything happens for a reason!!

SOOO now I get to start on her room!! I can't wait!!!! We've already had the paint and wall decal for some time now, but we didn't want to waste it.

Baby showers are both booked!! My Pittsburgh baby shower will be February 16th, at my house, and my Erie baby shower will be March 1st at the Elks Club. I'm really looking forward to both!

I'm 28 weeks pregnant now and still feeling pretty normal! Some days I have some back and/or rib pain, but nothing major. I'm sure this will continue to get worse as time goes on but its nothing I can't manage for now. A hot bath seems to do the trick for now!

I had my glucose test on Friday, which I'm still waiting for the results of. Going with a "no news is good news" for now. I have an appointment on Thursday so I'm sure if I failed, they will tell me otherwise then. Also, I had a sonogram on Friday to check to make sure my placenta had moved. At my anatomy scan they told me I had a low lying placenta, meaning it was closer to my "opening" than normal. But, they assured me its normal and usually resolves itself. They still had to do a scan to be sure it moved though, and it did! And baby girl is measuring about one week early! Heres one of the sono pics…You can see her little face!


I've made a few good recipes I need to share! Meatball Stroganoff, Sweet Garlic Chicken, Brown Sugar & Balsamic Glazed Pork Loin, Beer Crockpot Chicken and Baked Honey Sesame Chicken! I linked them all to the original sites I got them from because I'm too lazy to type them all out and review them in one post, and I don't have any pictures to share of my own! I promise they were ALL delicious!! If you need side dish suggestions for any of them, just let me know!

Tonight I'm trying the Pesto Chicken Stuffed Shells again, except this time, I'm using marinara sauce instead of alfredo, and I'm covering the shells in the sauce as opposed to just lining the bottom of the dish. I'll be sure to make a follow up post about it!

Other than that, nothing really new and exciting going on here. Just getting closer and closer to meeting our baby girl and I can't wait!!!

Tuesday, January 7, 2014

Two for Two!

-6* outside sure sounds like a good day to spend under the blankets on the couch. Which is exactly what I'm doing. I'm still working (kind of), but I could sure get used to this! Counting down the days till maternity leave (approx 97 days, 66 work days)! 

Anyway, the real reason for my post today...Another winning pinterest recipe!! I know the other day I said since getting pregnant I've been having trouble with chicken. And thats true….unless said chicken is fried, or covered in cheesy goodness and hidden inside a noodle! This is where Pesto Chicken Stuffed Shells comes in! One of our latest favorite recipes in our house has been Pesto Ranch Crockpot Chicken. The first time I made that recipe, seen here, Steve told me it was the "best chicken he's had in a long time". To me, this is even better!! AND it's super easy! (BONUS!)

Ingredients

  • 16-18 Jumbo Pasta Shells, Cooked and Drained
  • 1 Cardboard Container of Chicken Broth
  • 2 Cups Shredded Cooked Chicken
  • 4 oz. Cream Cheese, Softened
  • 1 Cup Freshly Grated Parmesan Cheese, Plus 1/4 Cup for Topping
  • 3 Tbsp Prepared Pesto
  • 2 Cloves Garlic, Minced
  • Salt and Papper to taste
  • Plain Greek Yogurt (About Half of a Single Serve Cup)
  • Panko Style Bread Crumbs
  • Alfredo Sauce


Directions

  1. Boil Chicken (I used tenders) in Chicken Broth until cooked, shred.
  2. While Chicken is boiling, combine Cream Cheese, 1 Cup Parmesan Cheese, Pesto, Garlic, Salt & Pepper, and Yogurt.
  3. Also while Chicken is cooking, cook and drain the Shells, and prepare Alfredo Sauce (recipe using remaining cream cheese below)
  4. When Chicken is cooked, add to Cream Cheese mixture, combine well
  5. Spray baking dish with non-stick spray, pour Alfredo into bottom of pan.
  6. Stuff Shells with Cream Cheese/Chicken mixture, place in dish on top of Alfredo.
  7. Top with remaining Parmesan Cheese and sprinkle with Panko.
  8. Cover, bake for 20 minutes.
  9. Uncover after 20 minutes, bake an addition 5 minutes uncovered.
Alfredo Sauce
  • 1/4 Cup Butter
  • 4 oz. Cream Cheese
  • 1 tsp Garlic Powder
  • 1 Cup Milk
  • 3 oz. Grated Parmesan Cheese
  • Pepper
  1. Melt Butter in non-stick sauce pan, add cream cheese and garlic powder, stirring with a whisk until smooth.
  2. Add milk a little at a time, whisking to smooth out lumps.
  3. Stir in parmesan cheese and pepper, remove from heat when sauce reaches desired consistency.
I served my shells with a salad and fresh italian bread. Delicious!! One of the comments I read on the review said they prepared the shells covered in spaghetti sauce, which I think I'll try next time!

Stay warm friends! :)